Sunday, June 27, 2010

Mom's strawberry pie recipe


Hi All,

I actually posted this recipe two years ago here but I've got some people that are new to my blog so I thought I'd re-post it now that strawberries are in season here. This recipe would be one of my "last meal" requests and I haven't met anyone who doesn't like it. It's a very light pie, and for me, something I could finish off in a day all by myself (a slice for breakfast, a snack, dessert after lunch, another snack, dessert after dinner...).

I used the recipe as written in my blog two years ago and tested it this weekend to make four pies. Less than one pie is left since they're pretty popular. The following recipe makes two pies.

Ingredients:
2 graham cracker crust (though it's almost as good without a crust if you prefer)
1 large bag (500 g or 1 lb) marshmallows. Miniature marshmallows are easier but large is fine.
1 pint or 500 ml of whipping cream
4 cups or 1 L of chopped strawberries with a bit of sugar

Instructions:
Chop the strawberries into small pieces. Sprinkle with enough sugar to get the juices flowing.

Melt the marshmallows over low heat. Before pouring the marshmallows into the pan, add a bit of water to the pan, just enough to cover the bottom. It helps with the sticking. Stir frequently and keep the heat low! When most of the marshmallows are melted, take the pan off the heat. The rest of the marshmallows will melt with the residual heat if you stir and mush the lumps. Cool to room temperature or slightly warmer. You want it just warm enough to be able to stir the marshmallows. It's fluffier the more you let the marshmallows cool.

While the melted marshmallow is cooling, whip the whipping cream in a good size mixing bowl. You can add sugar to the whipping cream if you like, but it's not necessary.

Fold the melted marshmallows into the whipping cream and add the strawberries. There are two schools of thought on how to fold the strawberries and cream into the marshmallows - you can do it all at once and the theory is that it causes less of the whipped cream to collapse. Or you can fold the whipping cream in first and then add the strawberries gradually. Either way seems to work fine.

Add the mixture to the graham cracker crusts and chill. Pour any remaining mixture into cups and eat later. Garnish with sliced strawberries if you like. Mom usually cuts strawberries in half and puts them on the pie starting from the centre to form a radial pattern. That, of course, is too fussy for me so I either serve with chopped strawberries drizzled over top, or just eat plain.

If you don't want to do a crust, you can pour a bit of the mixture into a clear glass, add a thin layer of berries, top with more mixture, more berries, etc. It's quite pretty when served in a clear glass.

Let me know if you try the recipe and like it or have tips on how to improve the instructions. You can see additional pictures here.


Cheers,

Sandy

P.S. Apparently the ingredients are somewhat North American. Fiona from the UK has adapted the recipe to great success and you can see her blog entry here.

Tuesday, June 15, 2010

Ick!!! Week 24 of canes


I have to immediately start this entry with apologies to Lindly Haunani and Maggie Maggio, this atrocity is in no way related to their talent and skills as book writers. The fault is all mine.

I've been playing with their wonderful book, Polymer Clay Colour Inspirations and thought I would do an entry on one of their necklaces. It uses a three colour skinner blend cane. Right from the start of my colour choices I knew this was going to be trouble. It would help if I really worked through the exercises each in sequence, but I started having problems with the collage portion of the exercise.

I love jewel tones: ruby reds, emerald greens, cobalt and indigo blues and deep almost golden yellows. Unfortunately, I can never seem to make them work together in polymer clay. I suspect a lot of that has to do with the lack of a good Kato cool red (Kato, are you listening? This is by far my biggest wish in clay. Your red concentrate is a nice cool red - please make that in big blocks).

But I thought I would try it one more time for the necklace. A nice deep blue, a golden yellow, and a red as nice as I could make it. Unfortunately the blue and red together make a bit of mud, though more purple than I was expecting. But the jewel tones are very muted and the blend wasn't as nice as I had hoped for at all.

Putting together the necklace is tedious, and about halfway through shaping the petals, I realized that I wasn't going to have the patience to complete the task. So I thought a mosaic might be nice, perhaps something around a nice centre piece, maybe sun like or something. But, I didn't have a nice centre piece so I thought I would do the outside first and perhaps fill in the centre piece.

Here's the result. Ick. It looks like a macaroni diorama that a 6 year old would put together. Ick.

So, I may keep this as a reminder of what not to do, or, I may be brave and just throw it out. I'm pretty sure this is beyond redemption and really, there are a lot of other projects that I'd like to tackle.

I almost didn't post this, I'm so embarrassed about it. But, for those of you that might tackle the necklace, you may wish to know what colours to stay away from. At least with Kato. Surfingcat Cara did a great job with her necklace. You can see it here.

Cheers,

Sandy

Sunday, June 13, 2010

Leaf cane continued - week 23 of canes


Hi Everyone,

I had a great huge pile of scrap clay from yesterday's efforts with the leaf cane. I decided that I would try to do something with it. Since it's related to canes I've decided that I get to call this blog entry a caning entry.

At the last guild meeting Cynthia had one of Jana Roberts Benzon's laser cut pendants. It was wonderful to see the pendant up close. I've been an admirer of the technique for a while so I decided to play with it a bit.

I purposely didn't print off any pictures, I wanted the feel of the technique, but didn't want to imitate too much.

I also borrowed a bit from Gera Scott Chandler, I love the little people in this particular piece of hers.

This took a bit of time, and most of that was figuring out how I wanted it to look. I was haphazard in my approach. I would try an element, place it, and if I went "wow!", it got to stay there. I didn't sketch anything out to begin with. So it became a bit of a challenge as I placed more and more on the piece.

I would say the piece is about 90% done. I'm not sure what I'm going to do with it or if I will add any more embellishments. I don't wear pendants or brooches and it really doesn't go with a whole lot in my wardrobe. I might give it to someone if they want to finish it. Or, I suppose I could use it to cover a tin, I haven't done one of those in a while. It would also give me the opportunity to use up more scrap clay which I barely touched.

For now, I'll let it percolate in my mind a bit. The photo doesn't do it justice, it really is quite pretty and I'm happy with it.

Cheers,

Sandy

Friday, June 11, 2010

Another leaf cane - week 22 of canes

Hi Everyone,

Occasionally I'll check my site meter to find out where the referrals are coming from. It often takes me on interesting journeys. Today I noticed that I had a few referrals from Tonja's Treasures where she discusses my posting on the Lee Valley sanding tools. Tonja gives a lot of credit to other artists, and Noelia Contreras' work drew my eye today with her transfer bracelets.

As I've mentioned before, I'm a sucker for leaf canes and one of the beads in her bracelets really called my name. It's the multi-leaf one.

Noelia's work really takes my breath away. We're all drawn to particular styles and I find I love her colour choices and shapes. I wish I knew how she makes the chocolate icing on her miniature cakes.

Here is my cane attempt at the transfer bead that she made. I made it a square shape because I think it'll go well for the glass that I want to cover.

I thought I'd show how I go about putting a cane together for this entry.

The first thing I do is usually sketch out what I want and then try to choose colours. You can see in the photo below that I've got my three colour choices and I've modified the orientation of the stripes in the leaves a bit to suit my tastes. I was aiming for something that was about 2 inches by 2 inches by 2 inches in dimension. That size seems to work well for me for reducing.


I thought this would be a fairly straightforward cane, but I am so rotationally challenged that I had a hard time with the striped portion. I generated a lot of scrap with just the striped portion. I'm not too concerned about it, I can use the stripes for other things. But in the future I would likely draw out how I want the stripes to go and really plan that out. I didn't this time because I figured "how hard could it be?". Getting the stripes right was the hardest part of the whole thing.

I used a cookie cutter for the leaf cuts. This allowed some uniformity but it wasn't quite perfect. There is some size difference in the leaves that I wasn't aiming for, but ended up being OK.


If you follow my blog at all you know that I hate packing canes. I tend to generate my background as a solid mass and then cut out the bits that I need to fill the cane with. It's a negative space approach and is somehow easier for me. It can be quite a bit cleaner and results in less distortion.

Here I've got my blue and white background as solid masses. I've placed the leaf patterns on top of the background so that I can push them gently on the background. This leaves a bit of a mark on the background and shows me where to put the cookie cutter to cut through the background.

Here's the cane once all the background has been cut away. You can see that there are very few cut marks in the background. I used the same cookie cutter to cut away the background that I used to assemble the leaf shapes.

At this point I was quite happy with the cane. Start to finish to here is probably two hours and most of that was figuring out how to do the stripes.

I stopped the cane last night and then started with the background this morning. This meant that the background was softer than the leaf bits because the leaf bits had rested in a cool basement for 12 hours. I knew that the softness was going to be an issue, but I wasn't disciplined enough to wait and let all the clay reach the same consistency. So I started reducing right away. I did lose a fair bit on the ends. The top leaf didn't want to move and the background certainly moved easily. Even as I was starting to reduce I kept telling myself I should wait.

But, no different than having chocolate in the house, I just couldn't leave it alone. In the end the only real harm done was that I had generated some more scrap clay than usual when I reduce. And it's going to make a blue that I can use in other things.

I'm quite happy with the cane and I have enough of it to do a few things with it. A friend of mine doesn't know it yet but she'll be receiving a bracelet. It actually came out like I wanted it to, and that's always a good thing. Even at quarter inch cane size the image is crisp and identifiable.


Once again I'm a week behind on my cane postings. I do have something that I'm working on, but I got sidetracked by this cane and the bracelets.

Cheers,

Sandy

Thursday, June 10, 2010

Bracelet tutorial


Hi Everyone,

As promised, here is the tutorial on making simple paper clip bracelets which I showed in my last post here. Time to make, once you get good, not including baking time is probably about a half hour. The hard part is choosing what colours to use.

You'll need:
  • Circle Kemper Cutters (or equivalent), size 7/16” and 5/8”
  • Spiral paper clips (8-12, depending on your wrist size and whether you want earrings), I bought mine at Staples, an office supply store in Canada, they come 50 to a pack for about $7
  • Jump rings, 2 mm inner diameter minimum, 8-12, these can vary in size
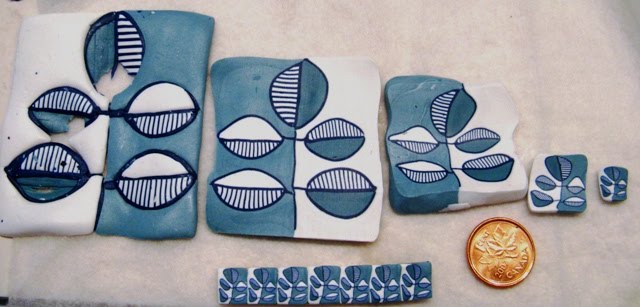
  • A decorative sheet of clay, medium thickness (4 on my Amaco 7 setting pasta machine with 7 as the thickest setting), 2 inches by 2 inches, or big enough to cut 10-12 of the smaller circles. You can be creative here and use veneers, canes, mokume gane, whatever. Mica shift, however, won’t work.
  • A complementary colour sheet of clay that will form the underneath, same pasta thickness setting, large enough to cut an equivalent number of circles. This can also be decorative but it's not critical.
A general note - I've sized the Kemper cutters to my clay thickness and what I like for the centre piece size. But if you don't have these sizes, change the thickness of your clay. There was some trial and error with this approach. If you find your ball too small, use a thicker piece of clay. Conversely, if you find the ball too large, use a thinner piece of clay or a different size cutter. Ideally you want the patterned piece size just a bit bigger than the diameter of the inner spiral of the paper clip.

Also, you may want to go through the steps just using one ball for the first few tries since you will be playing with sizing and with technique. But it's really easy so if you're at all adventurous you don't have to follow any of my suggestions.

Step 1 - Cut out the circles
Use the smaller Kemper cutters on the decorative sheet and try to choose portions that are interesting. Use the larger Kemper cutters on the complementary clay. Cut an equal number of each. It works best if you flatten the clay onto your cutting surface. That way the clay stays with the sheet and you don't have to worry about plunger marks in your circles.


Step 2 - Roll up the balls
Roll up the larger balls. I find it easier to do this production line format so I would roll all the balls before moving onto the next step.


Step 3 - Cap the large balls with the smaller circles

No real trick here - if you've got blodges of imperfections in the large balls you can cover them with the smaller circles. They should look like little acorns at this point.


Step 4 - Re-roll the large balls with the acorn caps
You'll turn the balls into balls with a bit of pattern on the top. Flatten these balls slightly. Ideally the diameter of the ball will be slightly larger than the diameter of the inner spiral of the paper clip. You can see in the photo below how the paper clip is resting on top of the flattened balls. Make sure you do the flattening so that the decorative sheet is on the top half.


Step 5 - Push the flattened ball through the paper clip
I find the shape better if you put the paper clip on top of the ball and push up through the paper clip. Once you've got the ball into the paper clip, smoosh it gently so that the centre spiral of the clip indents into the edges of the ball a bit. This will hold the ball in place in the paper clip. You can test this by trying to push the ball back out of the bead with some light pressure. You can see in the photo below the general effect.

Shape the top and bottom of the ball to the dome that you would like. You'll probably have finger prints on the ball at this stage so make sure to get rid of them.

Also, if you muck up here and don't like the shape or ding it with a fingernail or whatever other minor tragedies can occur, simply pull the ball out and re-roll. I found I'd be able to do several in a row, then I would start to get overconfident and two or three would mess up.

I didn't worry about whether my spirals were spiraling clockwise or counter clockwise. For the perfectionists among us, you may want to track that.

If you like, you can texture the bottom half or add other effects. Texturing can be a bit of a problem because it'll likely flatten your top surface, but that might be OK, depending on what you've done and what you want. You could actually make the bracelet reversible here if you're good with your bottom choice of clay. Or, you could alternate your clips so that they're facing bottom up, top up, bottom up, top up. There are a lot of options at this point.


Step 6 - Finishing Steps
Bake as usual. Finish however you would like. Some of you will sand and buff (not me, no how no way). I've added a coat of Future to some of the pieces and for the ones with metallics or mica in it it really brings out the shimmer. Use your finish of choice. It might also help a bit with gluing the balls in for the wobbly ones (which is why you might want to make a few extra).

I also sometimes like to put just a tiny dollop of PearlEx into my future before I apply the Future to some of what I finish. It can give it just a bit more oomph. You want it to be barely noticeable.

I made some jump rings for the first couple of bracelets. If you don't know how to make them, check out the simple tutorial here. There are a lot of different tutorials for making jump rings and it depends on how perfectionist you want to be. I simply wrap wire around a mandrel (in this case a knitting needle) tightly and then cut with wire cutters. Apparently that's a bit of a no-no since some of the edges won't join together properly, but my jump rings were so small and I was fussy in how I joined the seams that I didn't notice it. Go ahead and close the jump rings when you make them since you'll be sliding them onto the clips.

Once I got addicted to these I bought some jump rings at Walmart for $2.50 for 144 pieces. I liked the Walmart set because it came in three sizes.

Slide a jump ring onto one of the spiral clips and then slide another clip into the jump ring. There will definitely be a right and wrong side so you may have to slide the second clip on once or twice if you're like me and rotationally challenged. Add another jump ring to the second clip and put the third clip on. Continue until you've got the length that you want.

The one challenge to the bracelet is that it's a bit hard to put on by yourself. If you make your last jump ring a bit larger it's a lot easier to do this. But, if you don't like the look of the larger jump ring you can still use the smaller jump ring and have someone help you. I couldn't find any clasps that made the job easier, but I'm generally not a bracelet person so tend to be a bit uncoordinated when it comes to that anyway.

Earrings are SUPER easy with this technique. No jump ring required, just slide the clip into the earring finding.

I don't think I've forgotten anything here. Feel free to ask more questions if something's not clear.

Cheers,

Sandy


Tuesday, June 8, 2010

Uh oh, these are addictive....

Hi Everyone,

At Morrisburg Gaby mentioned that she liked to use spiral paper clips as an accent in her pieces. I decided to buy some at Staples and have been playing around the last few days with making bracelets.

I've been playing with different approaches and think I'm ready to create a tutorial. As Cindy Leitz likes to say "I learned by making mistakes so you don't have to". It'll take me a few days to put it together. The hard part is remembering the tips and tricks.


These are a huge hit at work, so much so that I'll be teaching several women how to make them. It's a great beginner project.

Thanks so much to Gaby and her wonderful class. I never would have been inspired to create these without having inspiration from her.

Cheers,

Sandy

P.S. I did post the tutorial. You can find it here.